Introduction to Natural Ambiance
Bringing a roof window into your home can reshape your living space with an influx of natural light and a renewed sense of openness. Whether you want to brighten a previously dark corner or introduce a striking view overhead, incorporating a roof window is both a practical upgrade and a decorative delight. This guide walks you through a complete process, offering clear instructions, handy tips, and detailed insights to help you install your roof window with care and precision. From exploring various skylight installation options to ensuring your roof and ceiling are prepped adequately, every detail is covered so that your project not only dazzles visually but also stands strong over time.
Understanding the Roof Window
When it comes to infusing your space with natural light, choosing the right window is key. The roof window can significantly enhance both the function and overall look of your home. It offers more than just an entryway for sunlight; it also contributes to energy efficiency and a modern aesthetic. A well-installed roof window can transform a mundane room into a bright, inviting haven that feels welcoming throughout the day.
Installing a roof window for Enhanced Living
Before starting your project, it’s wise to take stock of your needs. Ask yourself if the primary goal is to flood a dim space with natural light, widen the visual perception of a room, or provide a stunning view of the outdoors. In workspaces or small halls where brightness boosts productivity, a roof window can make an enormous difference. Conversely, if you’re aiming to capture a picturesque outdoor scene, you may prefer a more expansive design.
Consider not only the placement but also how the natural light will blend with your home’s decor. A compact bathroom might be perfectly served by a tubular model, which channels sunlight through a narrow passage, while a large living area might be best served by a more traditional fixed or ventilated roof window. This way, your design choice meets both the practical and visual demands of the space.
Styles and Varieties
There are several styles available to suit your tastes and space requirements. One popular option is the fixed roof window, which is set in place permanently and focuses solely on letting in natural light. Its design is simple and modern, ideal for rooms that benefit from a continuous glow without ventilation needs. This type of window works well in spaces where light is the main priority.
Alternatively, a ventilated roof window not only brings in abundant natural light but also encourages airflow. This style becomes especially useful in areas prone to dampness like bathrooms and kitchens, where the additional air circulation naturally helps manage moisture. For many homeowners seeking to maintain a fresher indoor environment, a ventilated roof window offers a smart and practical solution.
If you’re working with limited space or oddly shaped ceilings, consider a tubular roof window. This compact system directs natural light through a reflective tube, making it perfect for tight or unconventional spaces. Its design is specifically favored in modern homes where maximizing space is essential.
Energy and Cost Efficiency
While the visual appeal of your roof window is important, energy efficiency should not be overlooked. Many modern roof windows are crafted with features that help reduce heat loss in winter and minimize heat gain during summer. Innovations like low-E coatings reflect harmful ultraviolet light, thereby improving insulation and reducing energy expenses. Additionally, options with double-glazing add an extra layer of protection, ensuring that your home remains comfortable across seasons.
It’s beneficial to review performance data provided by manufacturers and select a product that suits your climate needs. For instance, if you live in an area with wide temperature swings, a roof window rated high for energy efficiency could be a wise investment to manage your heating and cooling bills better.
Preparing Your Home for a Roof Window Installation
Success begins with thorough preparation. Once you decide on a roof window that meets your needs, gather all the tools and materials required for a smooth installation. Typical kits may include the window frame, flashing components, screws, nails, roofing cement, and a set of clear instructions to follow.
Apart from what comes in the kit, arm yourself with common tools like ladders, utility knives, saws, and screwdrivers. Remember to prioritize safety with gloves and safety glasses at hand. Compiling a checklist of materials and safety gear really sets the stage for a hassle-free project.
Inspecting the Roof and Ceiling
A detailed assessment of your roof and ceiling is a must before beginning any installation. Carefully inspect the area for any obstructions—such as beams, ducts, wiring, or other structural elements—that may interfere with the placement of the roof window. Installing it without proper clearance could lead to issues like sagging or unwanted leaks later on.
It’s also important to determine the best spot on your roof. Optimally, the roof window should capture the most sunlight during the day. Examine the roof’s membrane and support beams closely; if you detect any damage or weakness, these should be repaired before moving ahead with the installation.
This preparation process mirrors essential practices found in skylight installation techniques, ensuring everything is well-aligned and secure before work begins.
Accurate Layout and Sizing
Precision is key when planning the layout for a roof window installation. Start by marking the exact dimensions on the ceiling where your new window will be placed. Use a fine marker to trace the shape and size needed accurately. Then, mirror these marks on the roof exterior to guide your cutting lines.
One effective method is to drive small nails at the corners from the inside out, providing a clear visual that connects both sides of your project. This approach reduces the risk of errors and helps align your work perfectly. Taking the time to double-check measurements can save you unexpected setbacks and frustration down the line.
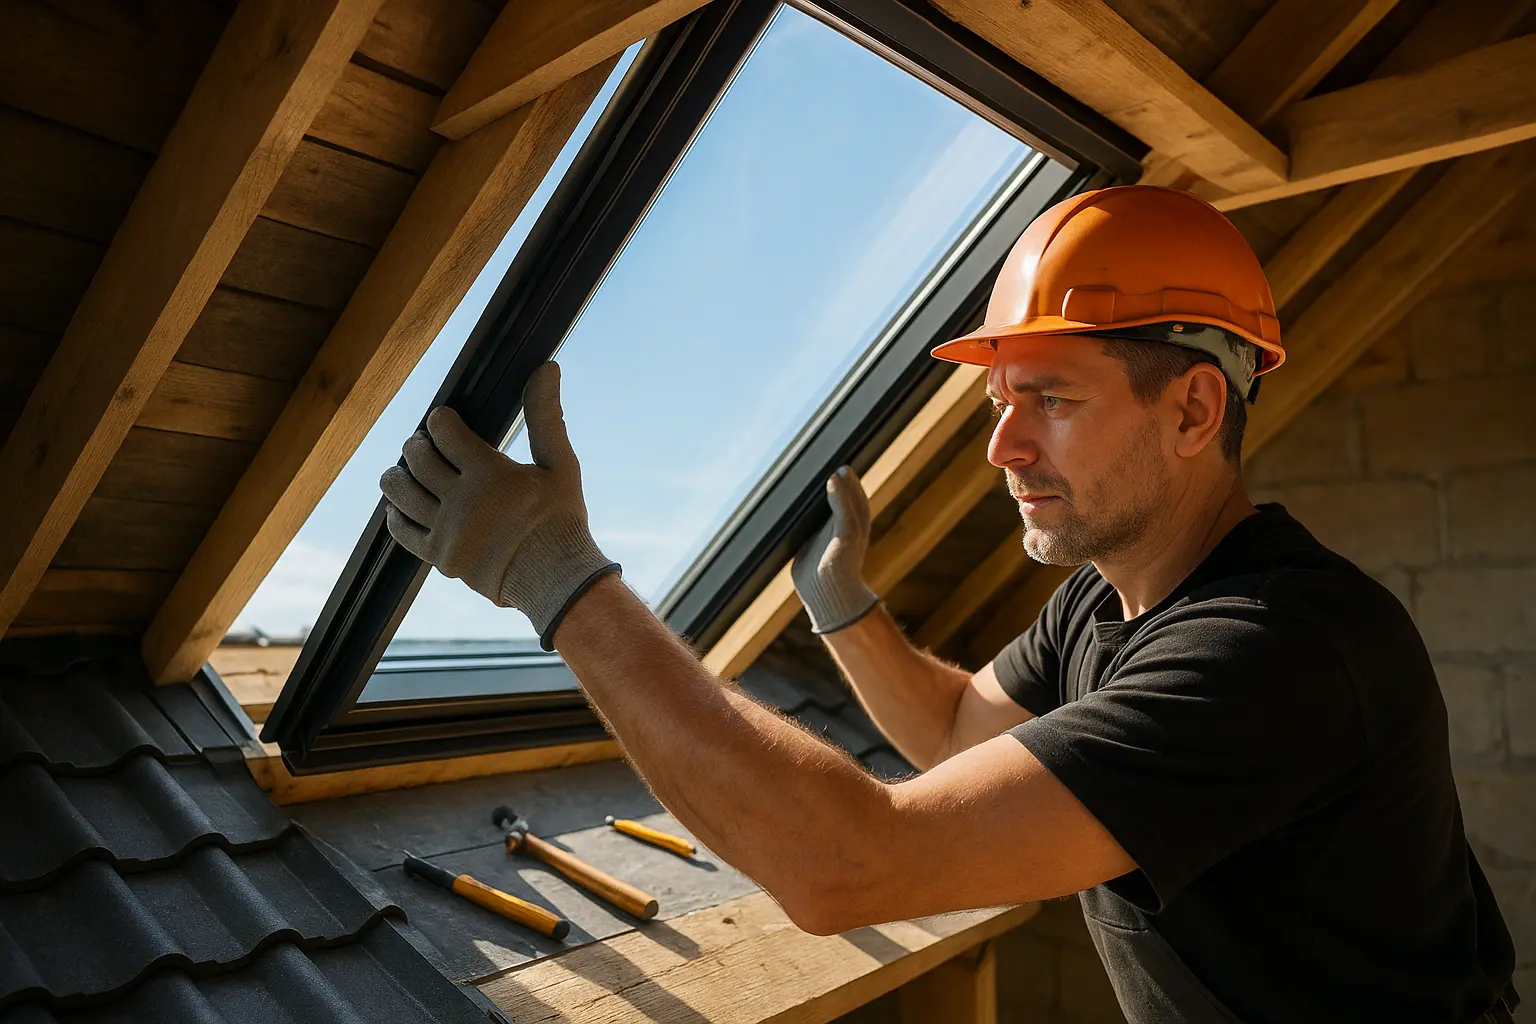
The Step-by-Step Installation Process
After you have carefully prepared and measured, it’s time to move into the actual installation phase. Each step requires attention to detail so that your new roof window performs reliably and looks fantastic over time.
Cutting, Framing, and Securing
First comes the cutting process. Following your marked lines, use an appropriate saw to create the opening in your roof. Work slowly to protect the surrounding materials and ensure that your cuts are straight and deliberate. This careful approach sets the stage for a flawless installation.
Once the opening is complete, the next move is framing. Building a sturdy frame around the opening is crucial—it not only supports the new roof window but also fortifies the overall structure. Choose durable, weather-resistant materials to construct the frame, especially if you reside in areas prone to heavy winds or snowfall. Additional support brackets or cross beams can boost stability further and should be installed as needed.
While constructing the frame, think about long-term durability. A well-built structure is the backbone of a reliable roof window installation, ensuring it remains secure for years to come.
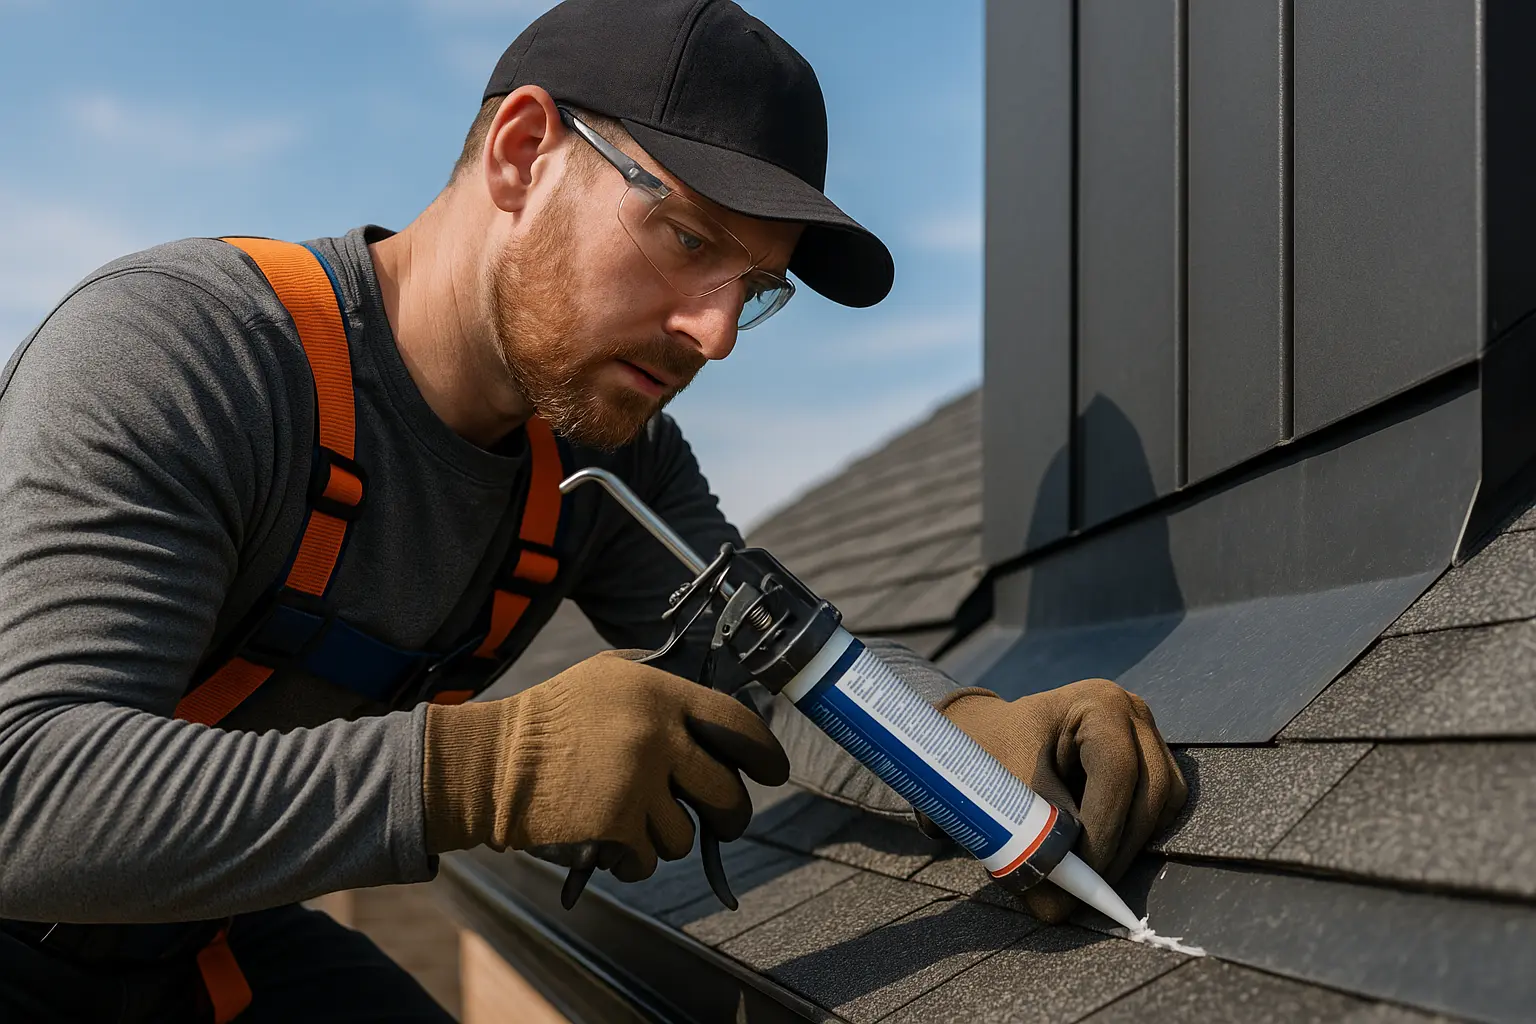
Sealing and Integrating Flashing
After your roof window is securely framed, it’s time to focus on sealing and installing flashing to protect against water damage. Start by applying a generous layer of roofing cement around the opening’s edges. This helps create a moisture-resistant barrier that prevents leaks.
Next, place your roof window carefully into the opening, ensuring it sits snugly against the frame. Fasten it with nails or screws as outlined in your instructions. Then, follow up with the flashing kit. The flashing is essential—it covers the seams where the roof window meets the roof and directs extra moisture away from the structure.
Using careful overlapping techniques with the flashing material creates a continuous seal, just as it does around other vulnerable areas like chimneys. Securely installed flashing not only boosts water resistance but also prolongs the life of your new roof window.
Final Touches and Thorough Inspection
Once the roof window is in place, complete the project with careful adjustments. Examine the window to ensure it fits tightly within its frame, checking for any gaps that could let in drafts or water. Use a quality caulk to seal any small openings for a smooth, uninterrupted finish.
Next, inspect both the interior and exterior finishes closely. Trim any excess materials and verify that the overall installation is flush with the ceiling. An additional run-through, checking for even light distribution and proper alignment with the roof’s slope, can provide peace of mind. In some cases, having an expert perform a quick inspection can catch details that might otherwise be missed.
This final walkthrough is critical—it confirms your work and ensures that the roof window, along with its flashing and natural light benefits, will serve your home well for many years.
Wrapping Up
Opting to add a roof window can truly uplift both the look and practicality of your home. By inviting abundant natural light, you not only enhance your everyday living environment but may also see improvements in energy efficiency by reducing the reliance on artificial lighting. Beyond aesthetics, a well-placed roof window can boost your property’s value by creating a cheerful, inviting atmosphere that resonates with potential buyers.
This thorough guide has unfolded every step of the journey—from selecting the ideal style based on your needs to meticulously preparing your roof and ceiling. With these clear instructions and helpful insights, you now have the confidence to proceed with your project, whether you tackle the roof window installation yourself or enlist a professional.
If the process ever seems daunting, plenty of resources are available, including local experts and suppliers who offer top-notch advice and quality products. They can assist you in choosing the right components so that your project turns out just the way you envisioned.
Your roof window is more than a window—it is a way to merge the beauty of nature with the comfort of your home. Embrace the transformation with careful planning and attention to detail, and soon you’ll enjoy the vibrant energy of natural light every day. Let your new roof window be a lasting reminder of the beauty that comes when indoor living meets the great outdoors.